–dry-run
dry-run的使用方式:

- none:就是当没有这个参数。
- client:只打印对象,不发送到apiserver。手写yaml时,可能容易出错,可以通过dry-run=client的方式来生成一个基本的yaml,再根据这个模版来修改。
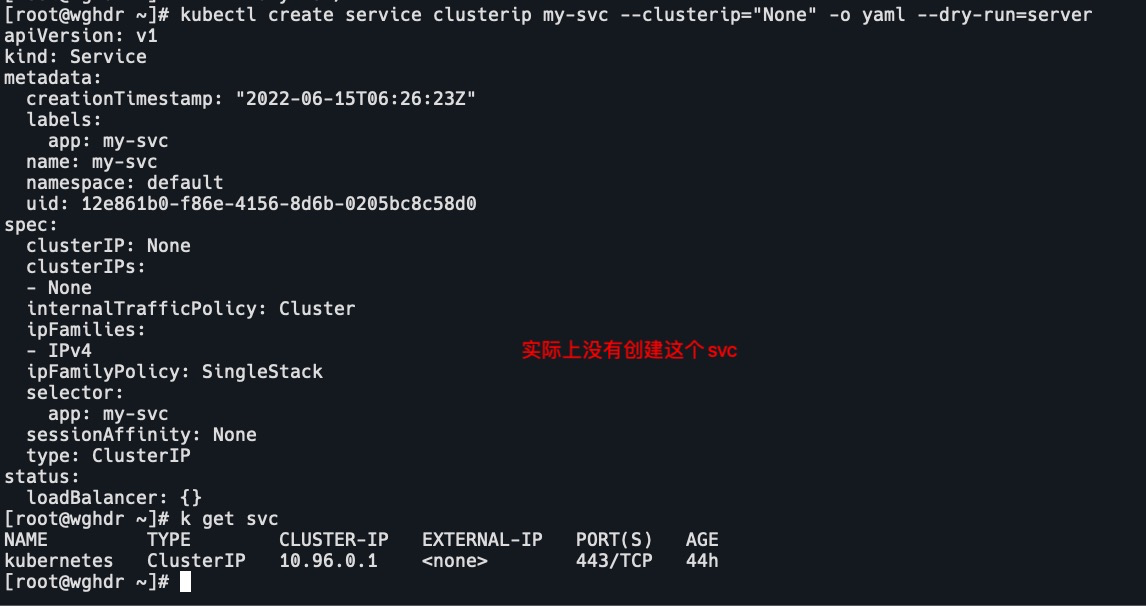
- server:发送给apiserver请求,但是不创建资源。
kubectl create service clusterip my-svc --clusterip="None" -o yaml --dry-run=server
创建pod
kubectl run nginx --image=nginx --dry-run=client -o yaml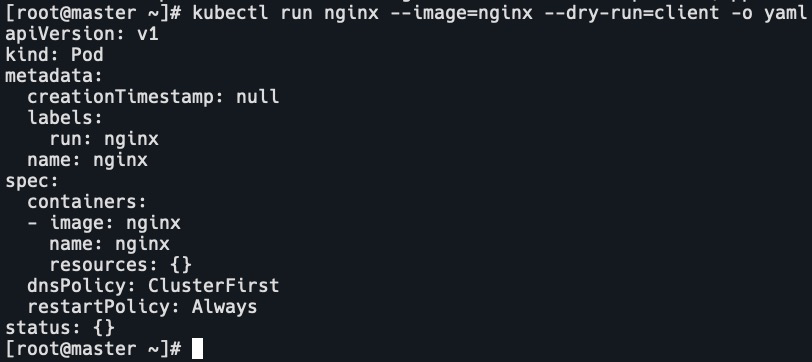
创建clusterip类型svc
kubectl create service clusterip my-svc --clusterip="None" -o yaml --dry-run=client
创建nodeport类型svc
k create service nodeport my-svc --tcp=4396:4396 -o yaml --dry-run=client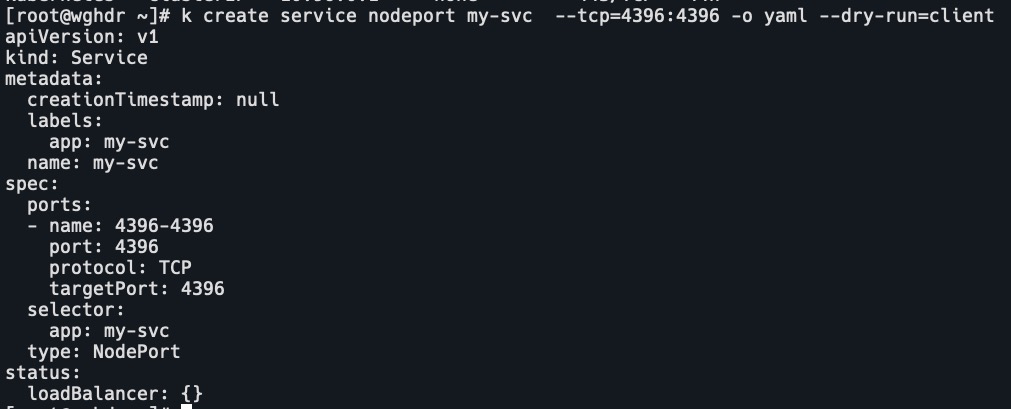
创建deploy
k create deploy my-deploy --image=nginx -o yaml --dry-run=client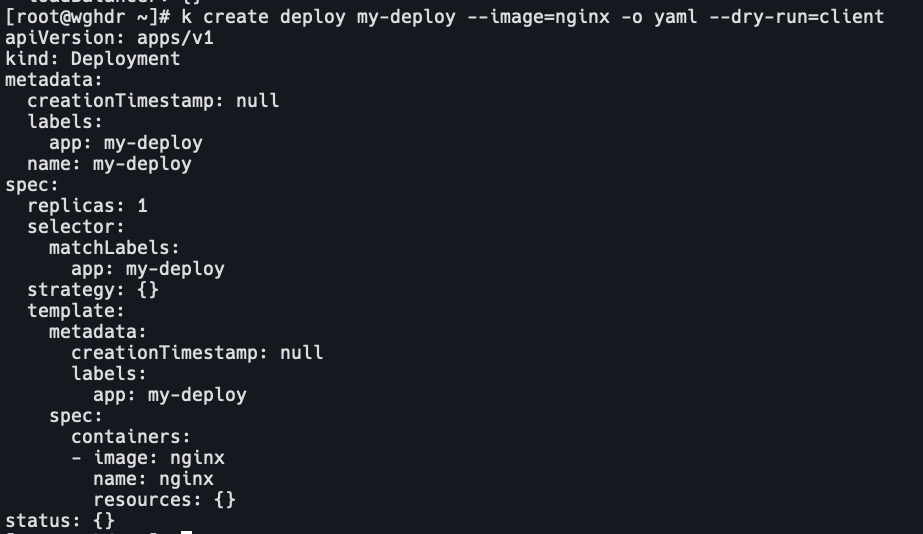
创建ingress,指定ingressClass,转发规则,默认后端,tls证书
k create ingress my-ingress --rule="foo.com/*=svc:8080,tls=my-cert" --class=default --default-backend=defaultsvc:http -o yaml --dry-run=client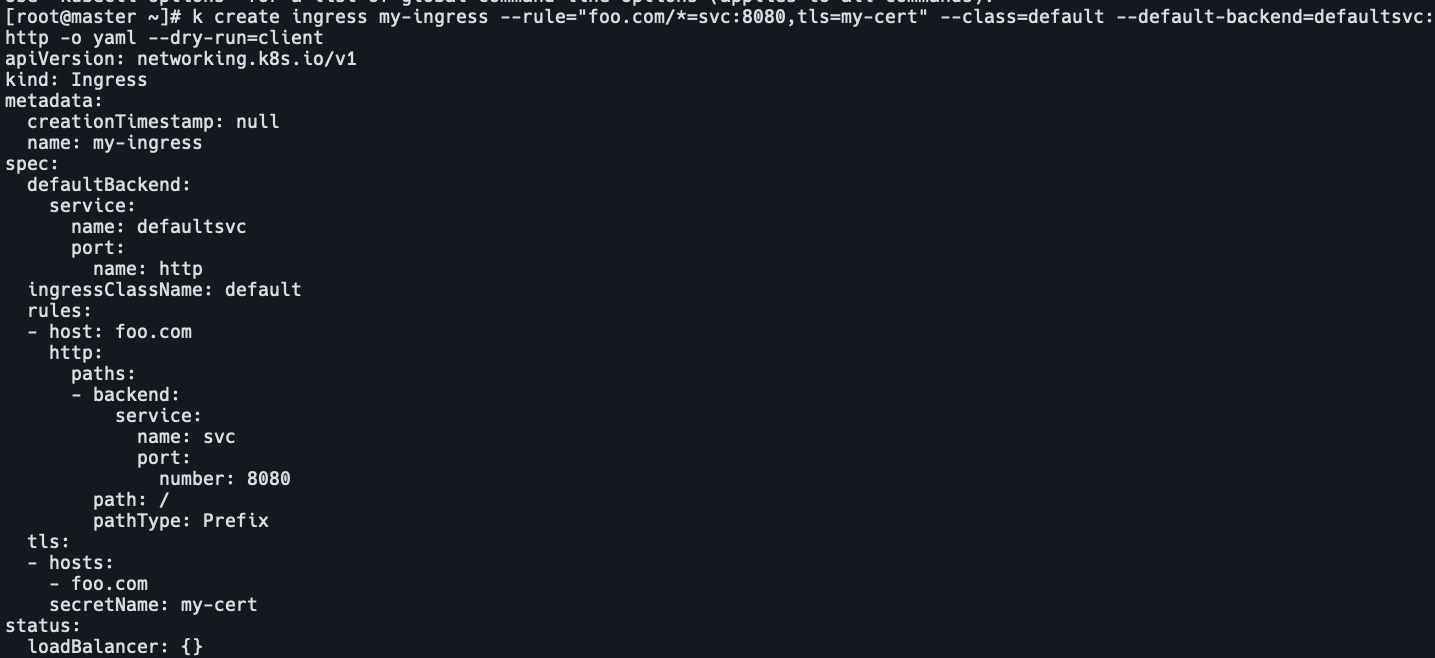
注意:不能create sts,ds
使用kubectl set更新dry-run生成的配置
k create svc nodeport my-svc --tcp=8080:43960 --dry-run=client -o yaml | k set selector --local -f - 'environment=qa' -o yaml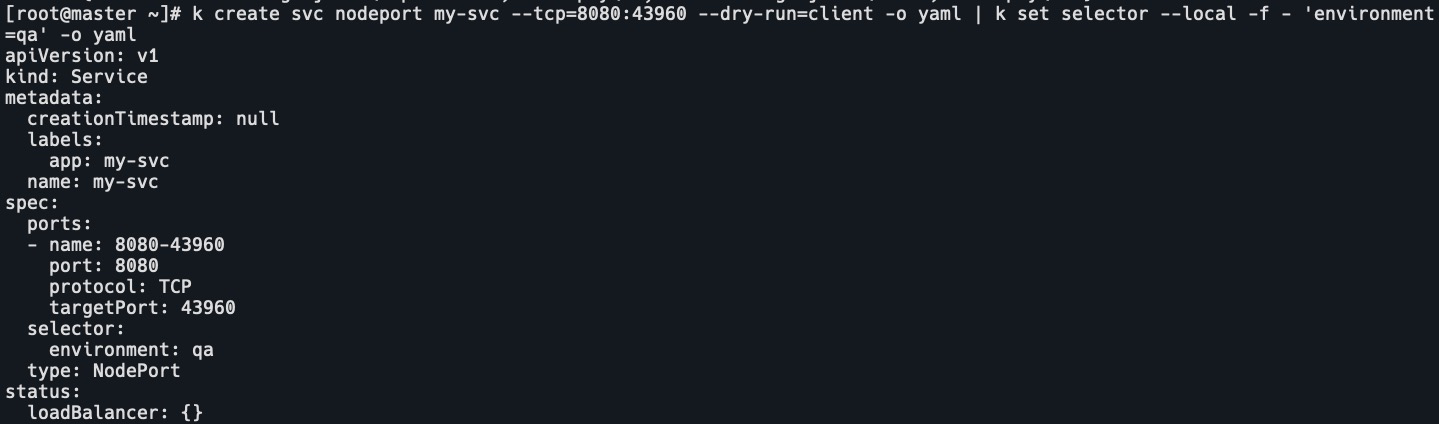
使用kubectl create创建所需资源
k create svc nodeport my-svc --tcp=8080:43960 --dry-run=client -o yaml | k set selector --local -f - 'environment=qa' -o yaml | k create/apply -f -
diff
kubectl diff – 查看集群建议更新的差异。
使用方式:
kubectl diff -f pod.json
# 或者
cat service.yaml | kubectl diff -f -
先创建一个php pod,再修改pod的副本数。
k diff -f php-apache.yaml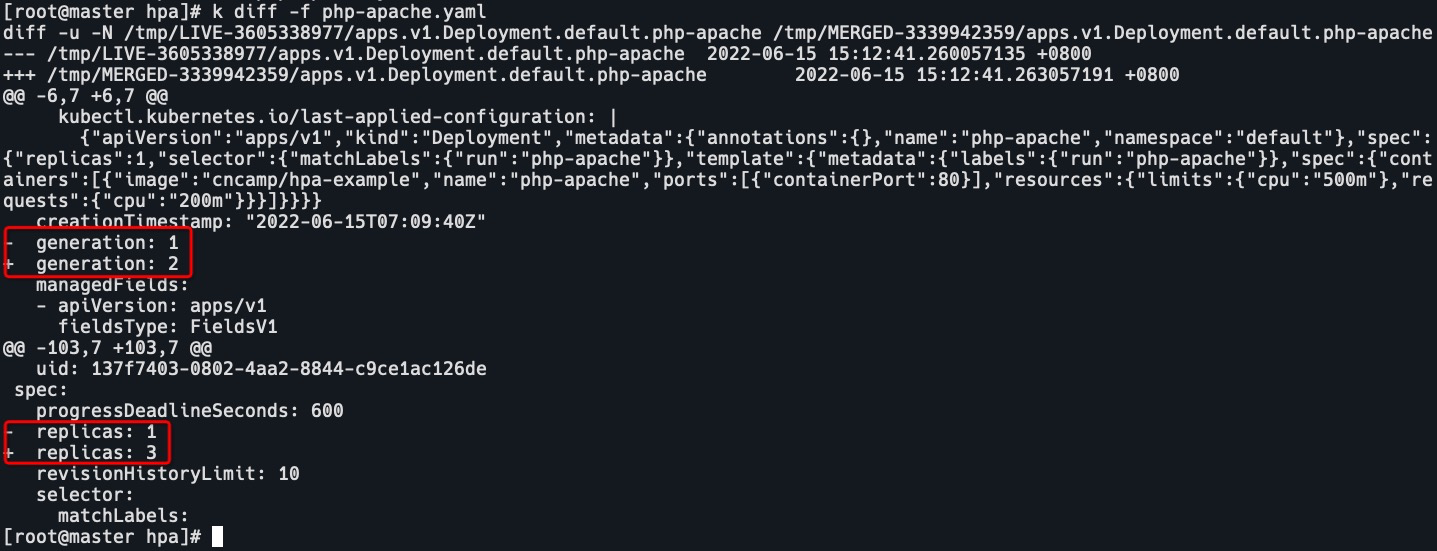
annotate
更新一个或多个资源上的annotations。
设置annotations
kubectl annotate pod php-apache-6cd4b65f7b-94bsb description='test annotations'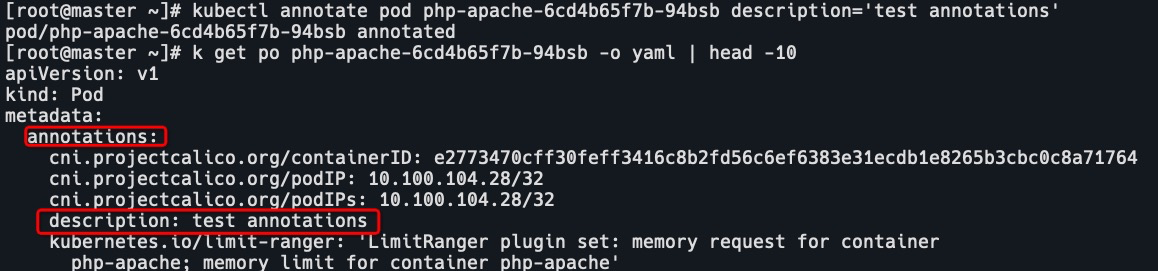
更新annotations
kubectl annotate pod php-apache-6cd4b65f7b-94bsb --overwrite description='annotations'
仅更新对应resource-version的annotations
k get po php-apache-6cd4b65f7b-94bsb -o yaml | grep resourceVersion
kubectl annotate pod php-apache-6cd4b65f7b-94bsb --overwrite description='only annotations' --resource-version=91114854
kubectl annotate pod php-apache-6cd4b65f7b-94bsb --overwrite description='only annotations' --resource-version=91114853
可以看到在resourceVersion有误的时候更新报错要在最新版本上运行。


删除annotations
kubectl annotate pod php-apache-6cd4b65f7b-94bsb description-
debug
在对pod进行排错时,除了查看pod logs和describe方式之外,传统的解决方式是在业务pod基础镜像中提前安装好procps(vmstat,pmap,pidof)、net-tools(netstat,telnet)、tcpdump、vim等工具。但这样既不符合最小化镜像原则,又徒增Pod安全漏洞风险。
这时就可以使用kubectl debug,它通过启动一个可交互容器,并将其加入到目标业务容器的pid, network, user 以及 ipc namespace 中,然后我们就可以在新容器中直接用 netstat, tcpdump 这些熟悉的工具来解决问题了。而业务容器可以保持最小化, 不需要预装任何额外的排障工具。
使用
k debug nginx-deployment-6799fc88d8-vxx6l --image=busybox
# 这里报错
Defaulting debug container name to debugger-2bx5z.
error: ephemeral containers are disabled for this cluster (error from server: "the server could not find the requested resource").修改kube-apiserver配置文件,开启临时容器功能,添加–feature-gates=EphemeralContainers=true

开启nginx pod
cat nginx.yaml
apiVersion: apps/v1
kind: Deployment
metadata:
  name: nginx-deployment
spec:
  replicas: 1
  selector:
    matchLabels:
      app: nginx
  template:
    metadata:
      labels:
        app: nginx
    spec:
      containers:
        - name: nginx
          image: nginx
k apply -f nginx.yaml
启动临时调试容器,–share-processes共享进程,–copy-to指定调试pod名字为nginx-debug,调试pod中的容器名为nginx-container-debug
k debug -it nginx-deployment-6799fc88d8-vxx6l --image=busybox --share-processes --copy-to=nginx-debug --container=nginx-container-debug通过复制pod和进程共享,可以看到pod中的进程文件等。

可以看打此时调试pod是有2个容器的包括临时容器


查看pod中是否允许进程共享
k get po nginx-debug -o json | grep shareProcessNamespace
k get po nginx-debug -o json | jq .spec.shareProcessNamespace
调试崩溃pod
创建一个立即退出的pod
kubectl run --image=busybox myapp -- false
使用debug创建pod副本,进入shell调试
kubectl debug myapp -it --copy-to=myapp-debug -- sh
# 报错需要指定存在的容器或者新的镜像
error: you must specify an existing container or a new image when specifying args.
kubectl debug myapp -it --copy-to=myapp-debug --container=myapp -- sh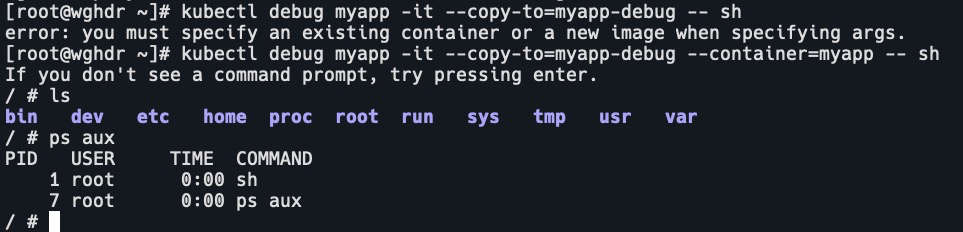
创建pod副本时,修改容器镜像
有些时候可能需要修改异常pod的镜像为调试镜像。
创建pod
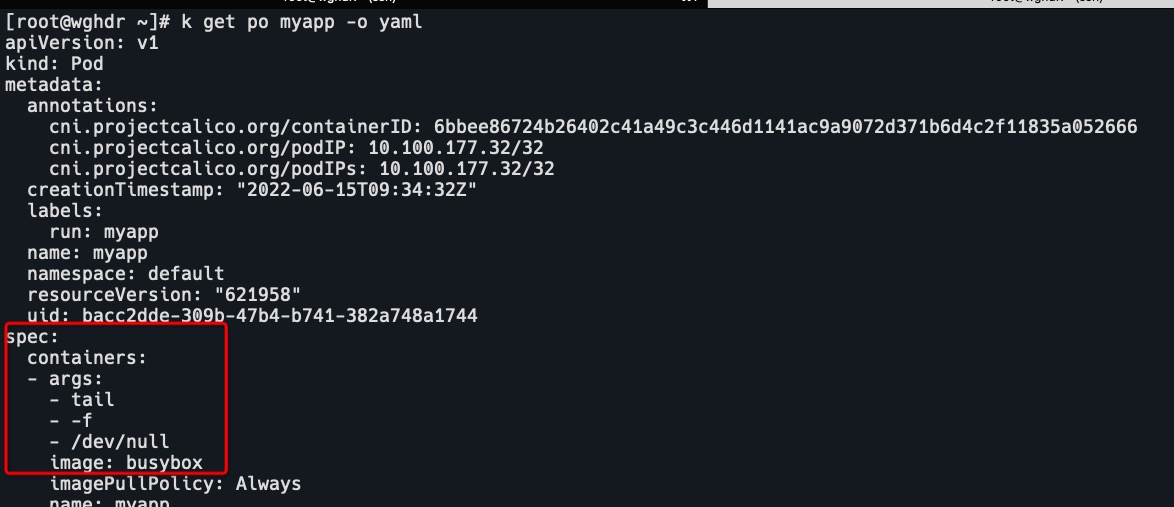
k run myapp --image=busybox --restart=Never -- tail -f /dev/null
k get po
创建副本,并改变容器镜像为centos
k debug myapp -it --copy-to=myapp-debug --set-image=myapp=centos --container=myapp -- sh
调试集群节点
kubectl debug 允许通过创建 Pod 来调试节点,该 Pod 将在指定节点上运行,节点的根文件系统安装在 /root 目录中。我们甚至可以用 chroot 访问主机二进制文件,这本质上充当了节点的 SSH 连接。
查看node
k get node
启动调试pod
kubectl debug node/wghdr -it --image=centos可以看到目录已经切换了。

查看pod

使用 chroot /host 突破 chroot,获取主机全部权限
cd /etc
chroot /host
cd /etc/kubernetes/manifests/
ls
patch
如果一个pod已经在运行,这时需要对pod属性进行修改,又不想删除pod,或不方便通过replace的方式进行更新,这时就可以使用patch命令。
命令格式
kubectl patch \
        (-f FILENAME | TYPE NAME) \
        [-p PATCH|--patch-file FILE] \
        [options]
使用-f指定文件/TYPE NAME(pod nginx)
kubectl patch -f node.json -p '{"spec":{"unschedulable":true}}'-p/–patch-file
kubectl patch deployment nginx --patch "$(cat patch-file-containers.yaml)"
kubectl patch deployment nginx --patch-file patch-file-containers.yaml
额外的参数
–dry-run
更换pod镜像
k patch po myapp -p '{"spec":{"containers":[{"name":"myapp","image":"busybox:latest"}]}}' --dry-run=client -o yaml
pod/myapp patched
k patch pod myapp --type='json' -p='[{"op": "replace", "path": "/spec/containers/0/image", "value":"busybox:latest"}]' --dry-run=server -o yaml
# 上面两种方法等价
更改service类型为NodePort
k patch svc nginx --type='json' -p '[{"op":"replace","path":"/spec/type","value":"NodePort"},{"op":"add","path":"/spec/ports/0/nodePort","value":30000}]'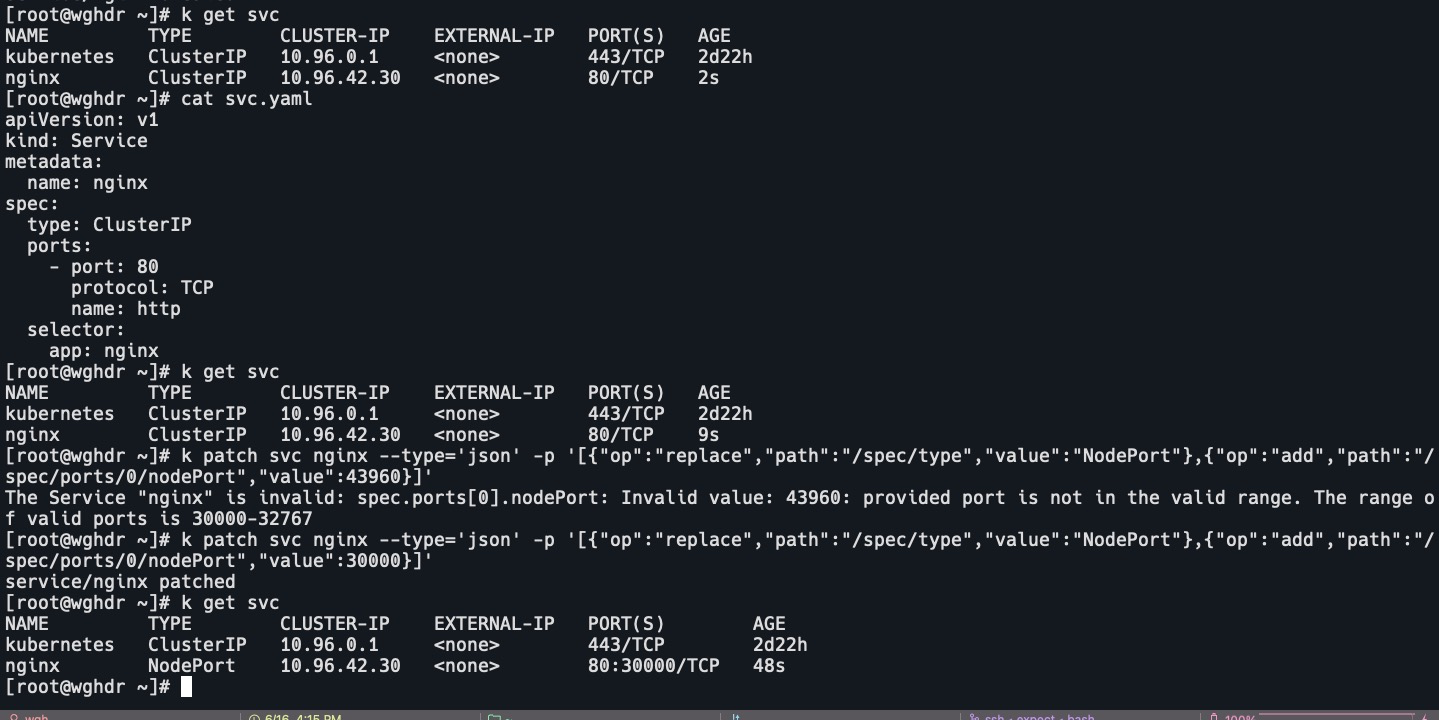
更改NodePort为ClusterIP
k patch svc nginx --type='json' -p '[{"op":"remove","path":"/spec/ports/0/nodePort"},{"op":"replace","path":"/spec/type","value":"ClusterIP"}]'
–type
–type=’strategic’: The type of patch being provided; one of [json merge strategic]
- strategic:strategic merge patch,策略合并,是默认的选项。
当你不指定 –type 或者 指定为 strategic,api-server 会根据 k8s crd 资源对象的字段定义(patchStrategy)决定如何该如何更新:- 不指定 patchStrategy 时,策略即为 replace
- 除此之外,还可以配置策略为 merge
replace和merge的区别:
假如json为:{ "txt": { "name": "wghdr", "age": 18, "gender": "male", } }需要修改成:
{
"txt": {
"name": "wghdr",
"age": 26,
}
}
如果是replace则json变为:符合预期
{
"txt": {
"name": "wghdr",
"age": 26,
}
}
如果是merge则json变为:不符合预期。有变更的字段发生进行更新,没有变化的字段则进行合并,并不会删除。
{
"txt": {
"name": "wghdr",
"age": 26,
"gender": "male",
}
}
- json
json patch,–type=’json’ 的 –patch 参数,跟的应当是一个 json 列表,该列表里的每个对象,都应是如下结构[ { "op" : "remove/add/replace", "path" : "" , "value" : "" } ] - merge
json merge patch,有相同的字段就替换,没有相同的字段就合并。和前面在 crd 资源对象的字段定义(patchStrategy=”merge”)效果一样。
merge的格式可以是json也可以是yaml。
注意
在 patch 的时候,有一些 key 比较特殊,会包含波浪线和斜杠,当 –patch 参数是 json 格式时,path 里的斜杠就会与 key 冲突,此时可以将 波浪线和斜杠 替换成如下转义字符
~ (波浪线)对应的是~0
/ (斜杠)对应的是:~1
replace
根据文件或者标准输入替换资源。
kubectl replace -f ./pod.json
cat pod.json | kubectl replace -f -
替换镜像tag
k get po nginx-75f4d489b4-mhrbj -o yaml | sed 's/\(image: docker.io\/bitnami\/nginx\):.*$/\1:v4/' | kubectl replace -f - --dry-run=client -o yaml | grep image
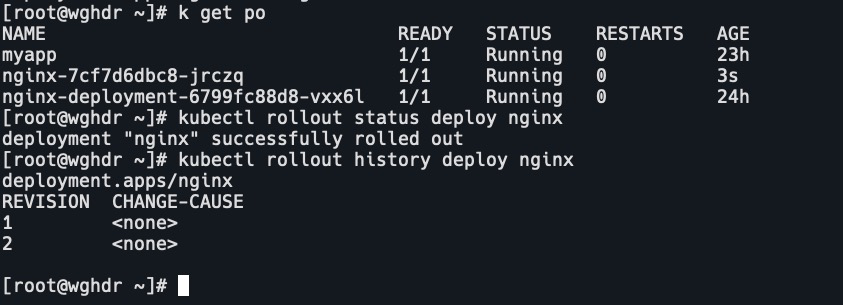
rollout
- history 显示 rollout 历史 –revision=3
- pause 标记提供的 resource 为中止状态
- restart Restart a resource
- resume 继续一个停止的 resource
- status 显示 rollout 的状态
- undo 撤销上一次的 rollout –to-revision=3
set
- env 更新pod模版中的env。
kubectl set env deploy nginx ENV=prod --dry-run=client -o yaml - image 更新模版中的镜像,可以是pod,deployment,daemonset,statefulset,cronjob,rc,rs。
kubectl set image deployment/nginx nginx=nginx:latest - resources 在对象的 pod templates 上更新资源的 requests/limits
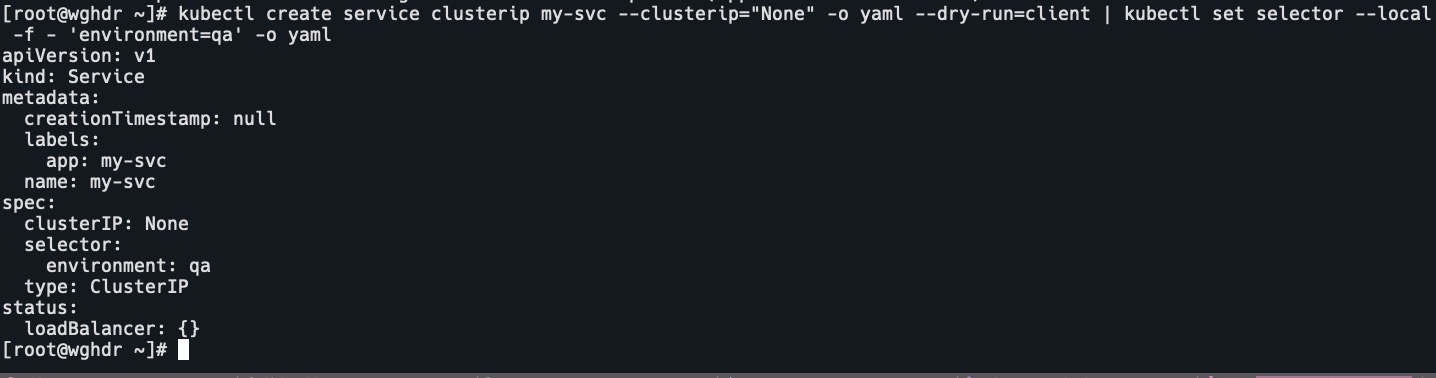
# 设置Requests和Limits kubectl set resources deployment nginx --limits=cpu=200m,memory=512Mi --requests=cpu=100m,memory=256Mi # 删除限制 kubectl set resources deployment nginx --limits=cpu=0,memory=0 --requests=cpu=0,memory=0 - selector 设置 resource 的 selector,只能用于Service对象。如果label已存在那么会覆盖。
kubectl create service clusterip my-svc --clusterip="None" -o yaml --dry-run=client | kubectl set selector --local -f - 'environment=qa' -o yaml - serviceaccount 更新sa。
k get deploy nginx -o yaml | grep serviceAccountName k set serviceaccount deployment nginx serviceaccount1 --dry-run=client -o yaml | grep serviceAccountName - subject 更新rolebinding或者clusterrolebinding中的用户,组,sa。
kubectl set subject clusterrolebinding admin --serviceaccount=namespace:serviceaccount1
kubectl set subject rolebinding admin --user=user1 --user=user2 --group=group1
kubectl create rolebinding admin --role=admin --user=admin -o yaml --dry-run=client | kubectl set subject --local -f - --user=foo -o yaml


cordon、drain、delete
三者在让node不可调度时,node上的pod处理各有不同。
- cordon:将node置为SchedulingDisabled不可调度状态,后续新创建pod不会调度到该node上。旧的pod不受影响,仍可以对外提供正常服务。
恢复调度:kubectl uncordon node - drain:驱逐node节点上pod,使其在其他节点上创建。
可以加-f驱逐没有被控制器管理的pod。kubectl drain foo -f驱逐node,但是给pod900s的宽限时间。
kubectl drain foo --grace-period=900 - delete:驱逐node上的pod,其他节点重新创建
config
用来修改kubeconfig文件。
- current-context Display the current-context
- delete-cluster 删除 kubeconfig 文件中指定的集群
- delete-context 删除 kubeconfig 文件中指定的 context
- delete-user Delete the specified user from the kubeconfig
- get-clusters 显示 kubeconfig 文件中定义的集群
- get-contexts 显示一个或多个 contexts
- get-users 显示kubeconfig中的users
- rename-context 重命名kubeconfig中的context
kubectl config rename-context old-name new-name - set 在kubeconfig中设置一个单独的值
kubectl config set PROPERTY_NAME PROPERTY_VALUE # PROPERTY_NAME是一个点分隔的名称,其中每个标记代表一个属性名称或一个映射键。映射键不能包含点。 # PROPERTY_VALUE是您想要设置的新值。二进制字段(如'certificate-authority-data')需要base64编码的字符串,除非使用——set-raw-bytes参数。 # 设置kubeconfig中集群地址为https://1.2.3.4 kubectl config set clusters.my-cluster.server https://1.2.3.4 # 设置kubeconfig中集群token为cert_data_here证书的base64编码 kubectl config set clusters.my-cluster.certificate-authority-data $(echo "cert_data_here" | base64 -i -) # 使用--set-raw-bytes=true kubectl config set users.cluster-admin.client-key-data cert_data_here --set-raw-bytes=true - set-cluster kubeconfig中设置cluster属性
kubectl config set-cluster NAME [--server=server] [--certificate-authority=path/to/certificate/authority] [--insecure-skip-tls-verify=true] [--tls-server-name=example.com] - set-context kubeconfig中设置context属性
kubectl config set-context [NAME | --current] [--cluster=cluster_nickname] [--user=user_nickname] [--namespace=namespace] - set-credentials kubeconfig中设置认证属性
kubectl config set-credentials --client-certificate=certfile --client-key=keyfile --token=bearer_token --username=basic_user --password=basic_password kubectl config set-credentials cluster-admin --client-certificate=~/.kube/admin.crt --embed-certs=true(插入证书到kubeconfig) kubectl config set-credentials cluster-admin --username=admin --password=uXFGweU9l35qcif - unset kubeconfig中取消设置配置
- use-context kubeconfig设置当前使用的context
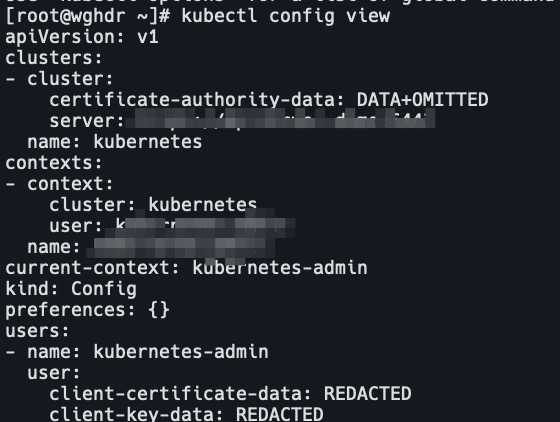
- view 显示合并的 kubeconfig 配置或一个指定的 kubeconfig 文件
# 不包含证书
kubectl config view
# 包含证书
kubectl config view --raw


explain
kubectl explain <type>.<fieldName>[.<fieldName>] --recursive(去掉解释)